- Nov 24, 2020
- 37
- 568
Hello everyone, I've recently been investigating different texturing techniques and today I bring to you two that I think you'll find very useful, hope you enjoy this tutorial.
Before we start, let's define the scope of this tutorial. This is not a full texturing tutorial, we will be working with the diffuse map only, I might consider doing other tutorials for normal, roughness, etc if I figure out a good way to make those. We won't be creating a texture from scratch either, we will be combining textures from different characters and even photos, you can follow along with the default Genesis 8 Female/Male texture as a base.
What we are going to do is use one of our existing textures and enhance it with some detail from a photo reference or from another texture. We will be using two different techniques to achieve this: color matching and texture delighting. This can be used for many things, you can combine the best parts of two textures into one, you can match a face texture to a different body texture or even matching genitalia textures to the body.
TOOLS AND SOFTWARE
For this specific tutorial we will be using Photoshop and DAZ Studio, but feel free to use your image editor of choice, everything we will be using is fairly standard.
PART1
COLOR MATCHING TEXTURES
For this first part we will be using a face texture that I'm currently working on. Since I just wanted to do the face and use existing body textures, I had to color match my face texture since I will be using the ears , scalp and some parts like under the jaw from the original, and also the brow area because I couldn't be arsed to remove the brows from my texture.
Here's how it looks before color matching

Yeah, I think it is somewhat noticeable, so let's fix it.
Now, stay with me, we are going to do some math, but it is super simple, I promise, and it will help us understand the things we will be doing .
Here's the problem, we have our original skin tone, and we need to add or remove something to it so it matches the target skin tone, if we put this into an equation it would look like this:
Original + X = Target
or
Original - X = Target
Let's focus on the first case, adding X, I'll explain why you would want to use the other equation later.
What we want to know is the Color X, so let's solve the equation:
X = Target - Original
Ok, easy, we just have to subtract the Original from the Target, so let's do that.
In Photoshop open your Target skin.
Select the color picker tool, make sure that in the tool options it is set to a large enough sample area, like 11 by 11 Average , and take a sample from a relevant area, in this case the cheek area will do.

As you can see , on my Target the scalp area is much lighter than the rest, so I will avoid taking a sample from there. Likewise, if I were to pick a sample from the lips that are very red, the results will be bad.
I noticed that there are some darker spots in the cheek area so I make sure to pick a more neutral sample. You can always go back and pick a different sample so don't worry too much.
Now, create a new Layer and rename it Target Sample, select a hard brush, make sure it's at 100% opacity and flow make it big and just put down a stroke, if you are using a mouse a single click will do. you should have something like this:
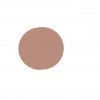
Yours will have the Target texture behind it if you created the new layer in the same document, it doesn't matter.
Now import your Original skin and to keep things organized drop it on top of the Target but below the sample we just took.
It should look something like this

Now repeat the process of taking a sample with the color picker, again pick a similar spot that is suitable, We'll go again with the cheek.
Create a new layer on top of the Target Sample layer and call it Original Sample.
Paint a blob with the same hard brush that we used previously, make sure it overlaps the first sample, it should looks something similar to this
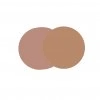 Note that this is zoomed in, the circles don't need to be super big. This was done with a single stroke of a brush with size 400, for reference.
The formula we put together before said we had to subtract the Original from the Target so let's do that now.
Select the Original Sample layer and in the blending options, select Subtract.
You should get something like this:
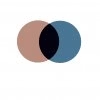 The actual colors will obviously depend on your samples, you get the idea
Now take a sample from the intersection of both colors, make sure that Sample All Layers is on in the color picker options.
We did it bois! We found X. Now what?
Well, before we continue, make sure the color is actually a color and not pure black. If it's not, then you can continue, if it is pure black (or white) then we will have to use the second equation, but I'll explain that later.
Now that we have the color we need select the Original layer, go to the bottom of the Layers pane, click the Fill / Adjustment layer button and select Solid Color, like this

It should automatically select our color, just hit accept and it just fill the whole layer with it.
Next, right click on the Solid Color layer and select Create Clipping Mask, this is not strictly necessary if your Original covers the entire layer. The only thing this does is to limit the solid color so it will only affect the Original layer. This is how it looks
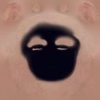
Here's where the magic happens. Remember our first equation? We had to add X to our Original to get the Target, so let's do that now.
In the Color Fill layer change the blending mode to Linear Dodge (Add), et voila, this is what we get
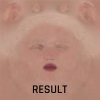
That looks much better. You will want to do more tweaks and adjust it further but this technique will save you a lot of time.
MY COLOR X TURNED OUT PURE BLACK, WHAT DO I DO NOW?
Don't worry, we have two equations so let's try the other one . We will be now subtracting X from our Original
First, make sure that both your Original Sample layer and your Target Sample layer are set to normal blending mode, this is very important so double check they are both set to normal.
Now move the Target Sample so it is now on top of the Original Sample layer, then switch the Target Sample blending mode to Subtract.
That's our color X, this time it shouldn't be pure black. If it is, make sure everything is in the correct order and go back and try the other method, maybe one of the two options is very very dark but not entirely pure black.
Now if we recall the second equation instead of adding, we have to subtract color X from our Original to get the Target.
Follow the steps to create a Color Fill layer but this time set the blending mode to Subtract, instead of Linear Dodge. Your skin should now be color matched.
PART2
TEXTURE DELIGHTING
Let's go for the second technique, texture delighting.
This is useful if you want to use a photo to add details to your texture or to create a diffuse map from it. It should be noted that while we will be using it to improve the nipples of a body texture this technique can also be used to create entire diffuse textures for walls and similar things from photo references, this is definitely not limited to skins.
Same as before, let's start with our problem, again I will use one of my own examples. This time I made a female character and I wanted a rather pale skin tone, so for the diffuse I used the textures from a character from the store because it looked suitably pale. For anyone wondering, it's Myriel for Teen Raven 8 and just to be clear, don't consider this neither an endorsement nor a critique of the character or the textures. If you get that character it will look very different from what I'm about to show you since the shader I'm using is completely different as are the rest of the maps.
Disclaimer done, let's see the problem

My character has some pretty big breasts, because of this the nipple texture is stretched too much and it becomes apparent that it's too low res. I also noticed that it has too much lighting information that we don't want, so this texture won't cut it for me as it is.
It should be noted that we could modify the UV maps for the nipple area to reduce the stretching, and I've done just that in the past. It could be a solution if you have multiple textures that you don't want to modify, but that is beyond the scope of this tutorial.
Instead, we are going to replace the whole nipple area with a new texture, and hopefully that will fix our issue.
Before selecting a reference photo to merge with your texture you should consider a few things:
Open Photoshop and load the texture you are going to improve
This step is not mandatory, but it really helps line up things.
Search for the UV templates of the texture you are working on, in my case that would be the Genesis 8 Female templates. If you want to get them, you can download them by logging into your account in the DAZ store, going to your product library and typing genesis 8 starter in the filter. Select the Genesis 8 Starter Essentials and download the Templates that should be on the list that pops up to the right. There's one for the female and one for the male.
Drop the correct UV template (Genesis-8-Female-Base-Female-1002.jpg for the torso in my case) on top of your texture. You can either lower the opacity to show the texture below or change the blending mode to multiply or linear dodge, which method you will have to use depends on the color of the template.
Since mine are black lines on a white backdrop, I chose multiply, here's how it looks

Now open the photo reference you are going to use to improve your texture. Mine is a pretty good reference, but it clearly has a bright highlight on one side that will be noticeable.
Here's the area I'm going to use and the problematic spot
 It might not look like much, but the difference in lighting between the right and left side is too big
Now copy the area you want to use and paste it to a new layer on the top of the layer stack in your texture.
You can use the eraser at 0% hardness to trim the borders of the image you just pasted so it will blend better if you want, but later we will do a filter that will provide a gradual fade off so don't worry too much about it. In fact I decided to just use the lasso tool to cut a circle with the nipple and a bit of skin and get rid of the corners that way, no fade out.
Place your new image on the correct place, to do that you can lower the opacity of the layer so you can see the UV and the original texture bellow.
If you have to correct the shape or perspective, there's a few tools you can use, these are the ones that I use
 I have lowered the opacity of the photo to about 50% to allow me to see the UV map
Change the opacity of the photo back to 100% and duplicate the layer by right clicking on it and selecting Duplicate Layer on the pop up (or pressing Ctrl+J)
Right click on the duplicate, select Create Clipping Mask from the menu
Hide this layer, we will be using it later.
Your layer stack should look like this

With the photo selected (not the duplicate), go to Filters -> Blur and select on of these two
 Don't worry about the details, that's why we duplicated it before doing the blur
Select the duplicated layer and make it visible
Change it's opacity to 50% and it's blending mode to Linear Light
Go to Filter -> Other -> High Pass and tweak the radius to control the effect.
IMPORTANT NOTE: In some versions of Photoshop you might need to click "Show All Menu Items" in order to see the Average and High Pass Filters
When you are happy apply the effect and that's it, here's the result
 Notice that it looks much more uniform and balanced now
If you need it you can now merge the two layers for our photo into one and apply the previous technique to color match the skin and do any further tweaking.
Here's a side by side of the character with the new texture vs the old one

Yeah I also changed the material of the nails, the old one was so flat it was killing me
I could adjust it more but it looks good enough for me at least, more so when compared to our starting texture.
FINAL THOUGHTS
Not going to lie, this took more time and was harder to make than I was expecting . I'm new to texturing , especially characters so I don't have a lot of experience and couldn't provide more examples. I tried to include tips and notes of possible problems you might encounter and I'll try to answer questions here, but given my limited experience I probably won't be able to help everyone. If you see someone's question and know the answer, please feel free to help. Also if you know any other tips or different methods you are welcomed to share them here.
Hopefully you find this tutorial useful and start making your own custom textures, can't wait to see your creations!
Before we start, let's define the scope of this tutorial. This is not a full texturing tutorial, we will be working with the diffuse map only, I might consider doing other tutorials for normal, roughness, etc if I figure out a good way to make those. We won't be creating a texture from scratch either, we will be combining textures from different characters and even photos, you can follow along with the default Genesis 8 Female/Male texture as a base.
What we are going to do is use one of our existing textures and enhance it with some detail from a photo reference or from another texture. We will be using two different techniques to achieve this: color matching and texture delighting. This can be used for many things, you can combine the best parts of two textures into one, you can match a face texture to a different body texture or even matching genitalia textures to the body.
TOOLS AND SOFTWARE
For this specific tutorial we will be using Photoshop and DAZ Studio, but feel free to use your image editor of choice, everything we will be using is fairly standard.
PART1
COLOR MATCHING TEXTURES
For this first part we will be using a face texture that I'm currently working on. Since I just wanted to do the face and use existing body textures, I had to color match my face texture since I will be using the ears , scalp and some parts like under the jaw from the original, and also the brow area because I couldn't be arsed to remove the brows from my texture.
Here's how it looks before color matching

Yeah, I think it is somewhat noticeable, so let's fix it.
Now, stay with me, we are going to do some math, but it is super simple, I promise, and it will help us understand the things we will be doing .
Here's the problem, we have our original skin tone, and we need to add or remove something to it so it matches the target skin tone, if we put this into an equation it would look like this:
Original + X = Target
or
Original - X = Target
Let's focus on the first case, adding X, I'll explain why you would want to use the other equation later.
What we want to know is the Color X, so let's solve the equation:
X = Target - Original
Ok, easy, we just have to subtract the Original from the Target, so let's do that.
In Photoshop open your Target skin.
Select the color picker tool, make sure that in the tool options it is set to a large enough sample area, like 11 by 11 Average , and take a sample from a relevant area, in this case the cheek area will do.

As you can see , on my Target the scalp area is much lighter than the rest, so I will avoid taking a sample from there. Likewise, if I were to pick a sample from the lips that are very red, the results will be bad.
I noticed that there are some darker spots in the cheek area so I make sure to pick a more neutral sample. You can always go back and pick a different sample so don't worry too much.
Now, create a new Layer and rename it Target Sample, select a hard brush, make sure it's at 100% opacity and flow make it big and just put down a stroke, if you are using a mouse a single click will do. you should have something like this:

Yours will have the Target texture behind it if you created the new layer in the same document, it doesn't matter.
Now import your Original skin and to keep things organized drop it on top of the Target but below the sample we just took.
It should look something like this

Now repeat the process of taking a sample with the color picker, again pick a similar spot that is suitable, We'll go again with the cheek.
Create a new layer on top of the Target Sample layer and call it Original Sample.
Paint a blob with the same hard brush that we used previously, make sure it overlaps the first sample, it should looks something similar to this
 Note that this is zoomed in, the circles don't need to be super big. This was done with a single stroke of a brush with size 400, for reference.
The formula we put together before said we had to subtract the Original from the Target so let's do that now.
Select the Original Sample layer and in the blending options, select Subtract.
You should get something like this:
 The actual colors will obviously depend on your samples, you get the idea
Now take a sample from the intersection of both colors, make sure that Sample All Layers is on in the color picker options.
We did it bois! We found X. Now what?
Well, before we continue, make sure the color is actually a color and not pure black. If it's not, then you can continue, if it is pure black (or white) then we will have to use the second equation, but I'll explain that later.
Now that we have the color we need select the Original layer, go to the bottom of the Layers pane, click the Fill / Adjustment layer button and select Solid Color, like this

It should automatically select our color, just hit accept and it just fill the whole layer with it.
Next, right click on the Solid Color layer and select Create Clipping Mask, this is not strictly necessary if your Original covers the entire layer. The only thing this does is to limit the solid color so it will only affect the Original layer. This is how it looks

Here's where the magic happens. Remember our first equation? We had to add X to our Original to get the Target, so let's do that now.
In the Color Fill layer change the blending mode to Linear Dodge (Add), et voila, this is what we get

That looks much better. You will want to do more tweaks and adjust it further but this technique will save you a lot of time.
MY COLOR X TURNED OUT PURE BLACK, WHAT DO I DO NOW?
Don't worry, we have two equations so let's try the other one . We will be now subtracting X from our Original
First, make sure that both your Original Sample layer and your Target Sample layer are set to normal blending mode, this is very important so double check they are both set to normal.
Now move the Target Sample so it is now on top of the Original Sample layer, then switch the Target Sample blending mode to Subtract.
That's our color X, this time it shouldn't be pure black. If it is, make sure everything is in the correct order and go back and try the other method, maybe one of the two options is very very dark but not entirely pure black.
Now if we recall the second equation instead of adding, we have to subtract color X from our Original to get the Target.
Follow the steps to create a Color Fill layer but this time set the blending mode to Subtract, instead of Linear Dodge. Your skin should now be color matched.
PART2
TEXTURE DELIGHTING
Let's go for the second technique, texture delighting.
This is useful if you want to use a photo to add details to your texture or to create a diffuse map from it. It should be noted that while we will be using it to improve the nipples of a body texture this technique can also be used to create entire diffuse textures for walls and similar things from photo references, this is definitely not limited to skins.
Same as before, let's start with our problem, again I will use one of my own examples. This time I made a female character and I wanted a rather pale skin tone, so for the diffuse I used the textures from a character from the store because it looked suitably pale. For anyone wondering, it's Myriel for Teen Raven 8 and just to be clear, don't consider this neither an endorsement nor a critique of the character or the textures. If you get that character it will look very different from what I'm about to show you since the shader I'm using is completely different as are the rest of the maps.
Disclaimer done, let's see the problem

My character has some pretty big breasts, because of this the nipple texture is stretched too much and it becomes apparent that it's too low res. I also noticed that it has too much lighting information that we don't want, so this texture won't cut it for me as it is.
It should be noted that we could modify the UV maps for the nipple area to reduce the stretching, and I've done just that in the past. It could be a solution if you have multiple textures that you don't want to modify, but that is beyond the scope of this tutorial.
Instead, we are going to replace the whole nipple area with a new texture, and hopefully that will fix our issue.
Before selecting a reference photo to merge with your texture you should consider a few things:
- The angle of the photo. You can use puppet warp to tweak the perspective but you should try to get photos that are as straight on as possible. Bonus points if they were taken with a camera with high focal length.
- The lighting. We are going to remove as much lighting information as possible, and we now know how to tweak the color to match, but if your reference has a harsh blue light coming from a side, you'll have to work a lot.
- The quality. This is not the size in pixels, it's more about how focused and clear is the area you want to use. More often than not some areas might be slightly out of focus and it only becomes apparent when you zoom in. You can try and use a sharpen filter to counter it if it is not too bad.
Open Photoshop and load the texture you are going to improve
This step is not mandatory, but it really helps line up things.
Search for the UV templates of the texture you are working on, in my case that would be the Genesis 8 Female templates. If you want to get them, you can download them by logging into your account in the DAZ store, going to your product library and typing genesis 8 starter in the filter. Select the Genesis 8 Starter Essentials and download the Templates that should be on the list that pops up to the right. There's one for the female and one for the male.
Drop the correct UV template (Genesis-8-Female-Base-Female-1002.jpg for the torso in my case) on top of your texture. You can either lower the opacity to show the texture below or change the blending mode to multiply or linear dodge, which method you will have to use depends on the color of the template.
Since mine are black lines on a white backdrop, I chose multiply, here's how it looks

Now open the photo reference you are going to use to improve your texture. Mine is a pretty good reference, but it clearly has a bright highlight on one side that will be noticeable.
Here's the area I'm going to use and the problematic spot
 It might not look like much, but the difference in lighting between the right and left side is too big
Now copy the area you want to use and paste it to a new layer on the top of the layer stack in your texture.
You can use the eraser at 0% hardness to trim the borders of the image you just pasted so it will blend better if you want, but later we will do a filter that will provide a gradual fade off so don't worry too much about it. In fact I decided to just use the lasso tool to cut a circle with the nipple and a bit of skin and get rid of the corners that way, no fade out.
Place your new image on the correct place, to do that you can lower the opacity of the layer so you can see the UV and the original texture bellow.
If you have to correct the shape or perspective, there's a few tools you can use, these are the ones that I use
- Free Transform: You can use this if you only need minor adjustments, like scale rotation and such. You can find it in the Edit menu on the top bar.
- Perspective Warp: This is more useful for stuff like walls and such, don't want to go in depth into how to use it here so play with it or check out a tutorial about how to use this tool. You can find it in the Edit menu on the top bar.
- Puppet Warp + Liquify: For this you can turn your photo sample into a Smart Object (right mouse in the layer) so any changes you do are non destructive. Use the Puppet Warp tool to adjust the general shape and then fine tune it by applying a liquify filter and tweaking it further. Again search for a dedicated tutorial on these tools if you need it. You can find Puppet Warp in the Edit menu and Liquify under Filters on the top bar.
 I have lowered the opacity of the photo to about 50% to allow me to see the UV map
Change the opacity of the photo back to 100% and duplicate the layer by right clicking on it and selecting Duplicate Layer on the pop up (or pressing Ctrl+J)
Right click on the duplicate, select Create Clipping Mask from the menu
Hide this layer, we will be using it later.
Your layer stack should look like this

With the photo selected (not the duplicate), go to Filters -> Blur and select on of these two
- Average: This works well for large photos (walls, floors...) but if your image is too small it might just turn it to a solid color.
- Gaussian Blur: This one you can tweak the radius, it gives better control on the result
 Don't worry about the details, that's why we duplicated it before doing the blur
Select the duplicated layer and make it visible
Change it's opacity to 50% and it's blending mode to Linear Light
Go to Filter -> Other -> High Pass and tweak the radius to control the effect.
IMPORTANT NOTE: In some versions of Photoshop you might need to click "Show All Menu Items" in order to see the Average and High Pass Filters
When you are happy apply the effect and that's it, here's the result
 Notice that it looks much more uniform and balanced now
If you need it you can now merge the two layers for our photo into one and apply the previous technique to color match the skin and do any further tweaking.
Here's a side by side of the character with the new texture vs the old one

Yeah I also changed the material of the nails, the old one was so flat it was killing me
I could adjust it more but it looks good enough for me at least, more so when compared to our starting texture.
FINAL THOUGHTS
Not going to lie, this took more time and was harder to make than I was expecting . I'm new to texturing , especially characters so I don't have a lot of experience and couldn't provide more examples. I tried to include tips and notes of possible problems you might encounter and I'll try to answer questions here, but given my limited experience I probably won't be able to help everyone. If you see someone's question and know the answer, please feel free to help. Also if you know any other tips or different methods you are welcomed to share them here.
Hopefully you find this tutorial useful and start making your own custom textures, can't wait to see your creations!
Last edited:
